Build a Stronger Core with the No Hands Get Up
If you’ve picked up even the slightest bit of kettlebell knowledge you’ll have learned about the Get Up. Not only is it a powerful, full body strengthening exercise, but it’s a great way to assess core, shoulder, and leg strength as well as mobility and coordination. There’s time under tension from the second you start until you bring the bell down safely to the ground.
Exploring the Brief History behind Stand-Up Sit-Down Test
The stand-up sit-down test, also known as the sit-to-stand test or chair rise test, has a rich scientific history rooted in physical therapy and gerontology research. Originally developed to assess lower body strength and mobility in patients recovering from injury or surgery, it gained prominence in the 1980s and 1990s as a valuable tool for evaluating functional fitness in older adults.
Initially conceived as a simple yet effective measure of one's ability to perform a fundamental task—rising from a seated to a standing position—the test has since undergone extensive validity and reliability studies. These investigations have highlighted its correlation with other indicators of lower body strength and mobility, as well as its predictive power for health outcomes like falls, disability, and mortality.
Today, the stand-up sit-down test is widely used across clinical, research, and community health settings. It serves as a practical assessment tool for physical therapists, occupational therapists, and healthcare professionals, aiding in the evaluation of mobility and strength in individuals with various health conditions. Moreover, it has found its place in fitness and wellness programs, helping participants track progress and set goals to improve functional fitness.
Now that you have understood the history behind this, let's delve into the Proper Form,
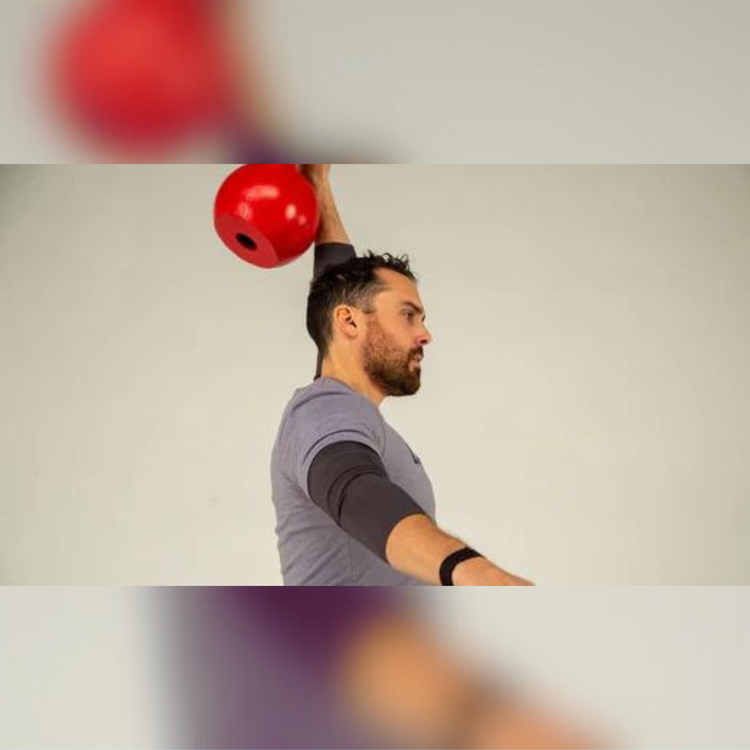
Proper Form and Technique
Traditionally you’ll be starting from the ground with a bell overhead and work your way up through a series of positions until you’re fully standing. You’ll then reverse the movement and make your way back to the starting position on your back on the ground.
If you're new to standing without using your hands, it's important to start slowly and focus on proper form. Begin by practicing simple movements, such as getting up from a seated position on the floor or from a kneeling position. As you become more comfortable with these basic movements, you can gradually progress to more challenging variations.
If we’re talking efficacy and functionality it’s a fantastic movement. Practicing getting up from the supine position is enough for most. Adding in load makes it significantly more challenging. Why is it so effective? For one thing it’s multiple movements in one. For a standard get up check out how many positions you’ll get into.
- Phase one: Starting on your back with your arm vertical
- Phase two: Transition to your elbow
- Phase three: Transition to a seated position
- Phase four: Transition to a hip extension (optional)
- Phase five: Transition to half kneeling windmill
- Phase six: Transition to the half kneeling position
- Phase seven: Stand up
- Phase eight: Back to the half kneeling position
- Phase nine: Back to the bottom of the half-kneeling windmill
- Phase ten: Back to the seated position
- Phase eleven: Back to your elbow
- Phase twelve: Back to the ground
Each rep done at controlled clip should take 30-45 seconds per side. That’s quite a bit of time under tension. Once you’ve gotten some time under your belt with the basic get up my favorite way to incorporate this movement is through the no hand variation. The no hand get up challenges your hip mobility and strength, core strength, shoulder mobility and strength, and overall coordination TREMENDOUSLY.
Here few things to consider for no hand variation
In order to get ready for the no hand variation there’s a few things you want to practice first to make sure you can do this safely and effectively. It should go without saying, but make sure you do this on a soft-ish ground to avoid putting excessive strain on your knees especially as you rotate and drive into the ground.
-
The Knee In with no hands
This prepares your hips and knees while getting you into the proper position. If one doesn’t have the ankle dorsiflexion or ability to bring your legs to either side of you this is as far as they’ll go. To start you can incorporate one hand as support until you can do this without them.
-
Add in Hip Extension
Once the first variation feels good you’re ready to add the hip extension to drive your glutes off the ground. This can be especially taxing on the knees so I’ll say it again...do it somewhere fairly padded.
-
Add in the Lunge
Once that feels comfortable you’ll practice swinging your back leg around toward the front into half kneeling lunge.
-
Return to ground
This is where it can get tricky. You want to avoid slamming butt-first back on the ground so you’ll coordinate your front leg back into the hip extended position. From here you’ll safely (and slowly) return back to the ground.
By practicing these bodyweight-only variations you’ll prepare the joints to be in positions they likely haven't been in and most likely not loaded. Don’t speed through this process. Tempering the joints and testing your range of motion will make sure you avoid that one way to Snap City.
Once you’ve moved on from the bodyweight versions (which are still good even on their own) you’re ready to load up! Here are five of my favorite ways to load up the no hand get up going from easiest to most taxing.
Five No hand Get up Variations
-
No Hand Get Up Chest-Supported
Starting from a seated position you’ll be holding the kettlebell at chest height. Depending on the weight and type of bell you can hold it upside down like a goblet position or by the horns. Maintain as much thoracic extension as you can to avoid rounding under the weight of the bell.
-
No Hand Get Up Racked
After the chest-supported position you’ll move on to the racked version. Since this will be unilaterally loaded it will create higher stabilization requirements. This is great way to challenge not only your core, but also your shoulders and arms. Keep your lat engaged to avoid rounding or letting the bell drop in the rack position.
-
No Hand Get Up Double Racked
This will put a significant amount of load on the spine if you're not careful. If you flex (round) excessively with a decent amount of weight you can create some pain. Force that intra-abdominal tension to create a nice, stable trunk.
-
No Hand Get Up Single Overhead
Now you’re ready for some fun and by fun I mean PLENTY of shoulder mobility and strength With this variation you’ll be starting from the ground as you would with a traditional Get Up. When you get to the seated position bring your feet to the side of the loaded arm. This will set you up to be in the half kneeling position with your overhead arm ready to perform windmills if you need help on the way down with that opposite arm.
-
No Hand Get Up Double Overhead
Just throw your hands in the air and get up like you don’t care. Seriously though, this is going to test your shoulder mobility quite a bit. Starting in the supine position with both arms vertical, use a little momentum to get up into the seated position. If this is as far as you can go it’s ALL good. Practice this and focus on driving your chest forward to ensure vertical arms. If you can keep going bring your feet to one side and let the training you practiced on the bodyweight version take over.
If you’re a die-hard Getter Upper then sprinkle these in for some variety and to make use of your lighter bells you’ve obviously outgrown. You’ll be pleasantly surprised at the challenge they create and what they can do for your strength and mobility.
Get Up Variations for Mobility and Strength
Squat to Stand
- Start by sitting on the floor with your feet flat on the ground and your knees bent.
- Place your hands on the floor behind you for support.
- Push through your heels and stand up, keeping your chest lifted and your back straight.
- Once standing, lower back down into a squat position and repeat for the desired number of repetitions.
Kettlebell Get Up
- Lie on your back with a kettlebell in one hand and your arm extended towards the ceiling.
- Bend your knee on the same side as the kettlebell and plant your foot on the floor.
- Press through your foot and roll onto your opposite elbow, then onto your hand.
- Lift your hips off the ground and slide your opposite leg underneath you, coming into a kneeling position.
- Push through your front foot to stand up, then reverse the movement to return to the starting position.
Bodyweight Get Up
- Start by lying on your back with your arms extended overhead and your legs straight.
- Bend one knee and place your foot flat on the ground, with your heel close to your glute.
- Press through your foot and roll onto your opposite elbow, then onto your hand.
- Lift your hips off the ground and slide your opposite leg underneath you, coming into a kneeling position.
- Push through your front foot to stand up, then reverse the movement to return to the starting position.
Author
Marcus Martinez
